Vichy Aqualia Thermal in 'Light' Review

vichy aqualia thermal in light moisturizer 48 hour hydration review

This product now has been revamped with a tweaked formula! See my review on the new formula here: Vichy Aqualia Thermal Dynamic Hydration Cream Review

I was introduced to this product shortly after my aunt received a consultation at Shoppers Drug Mart, and was given a bunch of samples suited for her skin type. She received samples of this moisturizer in 'Rich' and I began to test it out. I found it to really hydrate my skin overnight, although it wasn't suitable for daytime wear, underneath makeup. So my aunt went and picked me up the full-size in 'Light', which is a bit thinner, and can be worn underneath makeup without looking greasy.

Vichy claims up to 48-hour hydration, even for sensitive skin, hypoallergenic, contains soothing and fortifying Vichy Thermal Spa Water, paraben free, and non comedogenic.

I was very concerned about breaking out but after using this moisturizer for a few months, I did not have any severe breakout. However, I feel like rather than sinking into my skin, it sits on top of it. Another concern I have is that it contains dimethicone as well as alcohol and perfume. These are ingredients I would like to avoid in skincare products. I do find that sometimes when I apply the cream to my face, there is a slight burn on my cheeks in the areas where I have redness. A downfall in terms of packaging is the heavy glass jar that it comes in. I feel a bit unsanitary sticking my finger in the jar twice a day, and It would be nice if it came with a pump.

I haven't seen any other benefits from using this other than that it does what it says, and does not break me out. I hope that Vichy will look into alcohol and perfume free moisturizers in the future. If you are struggling with moisturizers breaking you out, especially those with natural ingredients, and are not sensitive to alcohol or scented products, then I would suggest giving this a try! You might be able to get your hands on a few free samples at your local drugstore, however, due to the high price, you might also be able to find a similar product for a more affordable cost.

Ingredients: "Aqua, Glycerin, Dimethicone, Hydrogenated Polyisobutene, Alcohol Denat, Pentaerythrityl Tetraisostearate, Pentylene Glycol, Stearyl Dimethicone, Propylene Glycol, Synthetic Wax, Glyceryl Isostearate, Sodium Hyaluronate, Phenoxyethanol, Ammonium Polyacryldimethyltauramide, Ammonium Acryloyldimethyltaurate / Steareth-8 Methacrylate Copolymer, Disodium Edta, Caprylyl Glycol, Citric Acid, Biosaccharide Gum-1, Acrylates Copolymer, Parfum"

This product now has been revamped with a tweaked formula! See my review on the new formula here: Vichy Aqualia Thermal Dynamic Hydration Cream Review


[Closed] Spring Into Beauty: Wave Rave Look & Giveaway

spring into beauty wave rave looking glass look and giveaway

With Spring soon approaching, we're all scrambling to know the latest Spring/Summer 2014 Beauty Trends. Thankfully, we have blogs, magazines, and social media to help us out...

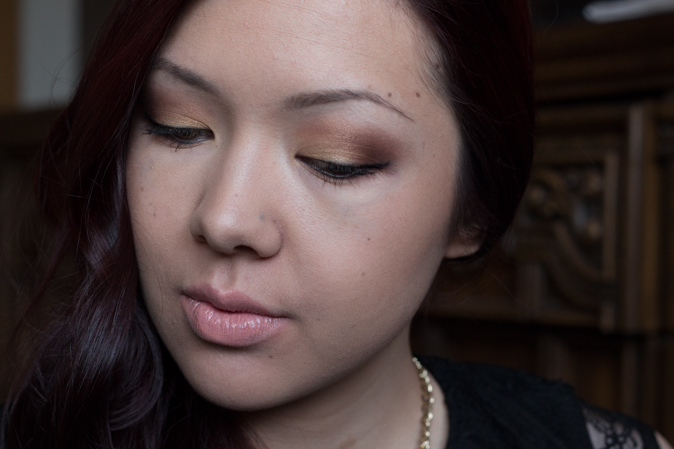
I was given the opportunity to purchase the necessary products from Walmart to recreate my favourite S/S'14 look from the Looking Glass Youtube Channel. After viewing all of the how-to videos, it all came down to the V-Files, or Wave Rave because these are looks I would typically choose for a night out. I ended up recreating Wave Rave because I was in love with the golden smokey eye look! You can watch the steps to get this look from CoverGirl Makeup Pro Amelie Ducharme, and Pantene Stylist Justin German, here.

spring into beauty wave rave looking glass look and giveaway

"By pairing your waves with flatter, sleeker hair at the top of your head, you're creating a much more modern look than the Veronica-Lake style bouncy side wave." - Justin German

To get the Wave Rave makeup look, I picked up...
- CoverGirl TruBlend Liquid Makeup in L5
- CoverGirl TruBlend FixStick Concealer in Fair L1-4
- CoverGirl EyeEnhancers 4-Kit Shadows in Coffee Shop
- CoverGirl Instant Cheekbones Contouring Blush in Sophisticated Stable

The TruBlend Liquid Makeup in L5 was way too dark for my skin, I definitely should have gone quite a few shades lighter (I actually darkened my neck a bit in these photos so I didn't look completely ridiculous, shh)! Although I did like how the foundation applied, and it gave me an almost medium, but buildable coverage. It is a water-based foundation and the entire line has actually been re-packaged, and 8 new shades have been added to suit a broader skin-tone range. I also picked up a Contouring Blush with 3 shades in 1, although Amelie used a different blush, the Cheekers Blush in Golden Pink, in the how-to video.

For the hair, I already had the 2 products recommended, but I only used the Pantene Stylers Flexible Hold Hairspray to keep the waves in place. Justin German recommends applying Pantene Pro-V Silky Moisture Whip to wet hair before blow-drying. 

spring into beauty wave rave looking glass look and giveaway

Creating the Wave Rave Look:
- I started off this look by priming and prepping my face.
- Then applied CoverGirl TruBlend Liquid Makeup L5 all over my face.
- Covered dark circles and highlighted the nose with CoverGirl FixStick Concealer in Fair.
- Lightly filled in my brows with Maybelline Define-a-Brow in Dark Blonde.
- CoverGirl Clean Glow Bronzer in Spices to define my cheekbones, and CoverGirl Contouring Blush in Sophisticated Stable. Hard Candy Bronzer in Tiki to highlight the cheekbones.
- Used CoverGirl 4-Kit Shadows in Coffee Shop for the eyeshadow: the gold on the lid, 2 browns blended in the crease, and the white to highlight my brow bone.
- CoverGirl InkIt! Eyeliner in Black on the upper and lower lash line, gently winging it out slightly. It was a little tough on my eyes so I went over it with another gel liner.
- Curled my lashes and used Maybelline's Rocket Volum Waterproof Mascara.
- Concealed my pigmented lip colour with CoverGirl FixStick Concealer in Fair, and then Hard Candy All Glossed Up Lip Crayon in Chic.
- For the hair, I brought all my hair to one side and curled sections with a 1" iron starting below the brow line. Then I pinned it all to the one side, and used hairspray to hold the curls and any frizziness in place.

GIVEAWAY:

For all you Canadian readers, [sorry everyone else :-( ], I also have a $50 Walmart gift card to give away!

- Tweet me your favourite look from the Looking Glass Channel and tag me @michellelouie, and hashtag #beautyunited!
- Then come back here and fill out the Rafflecopter form for your chance to win!
- Be sure to also follow me on GFC or Bloglovin :) The rest of the entries are not mandatory.

a Rafflecopter giveaway

The giveaway will end Monday night at 11:59 PM February 24, 2014 and the winner will be emailed that night. You will have 24 hours to respond with your mailing address and information! Good luck!

P.S. What did you think of my recreation of the Wave Rave look? Create your own favourite look and link them in the comments below :) I'd love to see!

Disclosure: I am a #BeautyUnited blogger. As part of my affiliation with this group I receive products and special access to P&G events. The opinions on this blog are 100% my own!

Canadian Olympic Fan-icure


Although the 2014 Winter Olympics are coming to an end, it is never too late to show your pride for being Canadian! To show mine, I've attempted a Canadian manicure- or shall we say fan-icure inspired by Tessa Virtue, an olympic figure skating gold medallist for Canada, and CoverGirl.

Tessa Virtue & CoverGirl recommend to place a piece of scotch tape over your smartphone and trace out the Canadian flag, cut it, then place it on the center of your nail and paint around it. Now, I don't know how successful this would work out, so I'd suggest to just draw the flag freehanded! A very thin brush or dotting tool, or better yet a nail art pen would be ideal.

CoverGirl Outlast Nail Gloss in Golden Opportunity, CoverGirl Outlast Nail Gloss in Ever Reddy, Sally Hansen 'I Heart Nail Art' Pen in White, (Not Pictured) Sally Hansen Insta-Dry in Clearly Quick

Steps I Used to Achieve the Olympic Fan-icure
Step 1: Apply 2 coats of CoverGirl Outlast Nail Gloss in 'Ever Reddy' to all the nails except the ring finger. Apply 2 coats of CoverGirl 'Golden Opportunity' on that nail.
Step 2: Look up an image of a Canadian flag for reference, and use a nail art pen to draw it out, either freehand or with a guide. I used Sally Hansen's I Heart Nail Art Pen in White (yes, I know the leaf is suppose to be red).
Step 3: Finish off with a clear top coat. I used Sally Hansen Insta-Dry.

A top coat is mandatory when using this nail art pen! I washed my hands when it had dried but still noticed a lot of the colour had faded off, so I had to go over the leaf one more time. Once I applied the top coat, there was no more fading! Ok sorry my nail art isn't perfect... I am no nail art expert, but I tried!

Congrats on Tessa and her partner for winning a Silver medal in their Ice Dance, and I wish the best of luck for the remaining competitors in the 2014 Winter Olympics! 
Do you watch the Olympics? What is your favourite sport to watch, or ever dream to compete in?

Disclosure: I am a #BeautyUnited blogger. As part of my affiliation with this group I receive products and special access to P&G events. The opinions in this post are 100% my own!
Valentine's Day Delight


As a kid, I'd love the idea of Valentine's Day. But over the past few years, I began to hate it. Not only because I never received a candy gram from a crush in high school, but because it just became a day to see what everyone's loved one has spoiled them with. I realize now, Valentine's Day isn't just for couples... it's a day for expressing affection to the ones you love and care about, whether it be a significant other, friends, or family.

Now having said this, I am still feeling a little grumpy today. And not because I don't have a Valentine..  I actually have 11 (heh, all friends), but because I am so exhausted from the stressful week I've had at school. Last night was my first night of more than 3-4 hours of sleep in the past few days. It felt great, but I can't help but want to stay home and sleep through the rest of today!

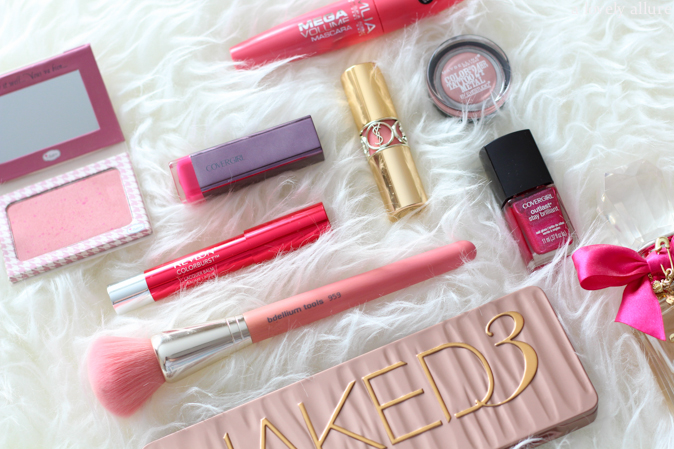
Even though I'm super exhausted, I will likely be going out with a few friends tonight for some drinks, as I'd promised them. I won't be doing my makeup until absolutely necessary (which means like, half an hour before I have to leave) so I unfortunately don't have a makeup look to show for. But I have posted some pink products above for a cute touch, and an idea of what I'll be wearing on my nails and lips tonight. I'm not totally sure if I'll be going with a nude or pink lip. But if I chose pink, it will definitely be more of a fuchsia.. only because I can't pull off any other type of pink...

Sending you all my love and best wishes, whatever you do today, stay safe and have fun! xoxo, 
What are your plans for Valentine's Day? Do you have a most memorable Valentine's Day moment?

Dyeing my Hair with L'Oreal HiColor in Magenta

As many of you may have seen, I dyed my hair red roughly near the end of September 2013. For some reason I've avoided blogging about it, but I'm finally going to share my experience with you all (from what I can remember!).

Pictured above are the main products I used. L'Oreal HiColor HiLights for Dark Hair Only in Magenta, L'Oreal 30 Volume Developer, & a measuring cup. Not included in the photo: brush, gloves, vaseline, mixing bowl, comb, old t-shirt, newspapers.

Why did I choose this colour? Well I was debating to go either a burgundy-purple colour, or do a balayage ombre. I knew that red faded quickly and so I wanted something a bit more vibrant - so that when it faded, it would be the colour that I wanted.


Now we all know the drill. Apply vaseline just after your hairline, neck ears (if you so please, I find it a bit of an annoyance sometimes). Cover your floor with newspapers, and put on those gloves!

I mixed one bottle of the hair dye with the required amount of developer. I don't remember how much, but there were precise instructions on the box! I actually bought 3 boxes, but I ended up only using 1 and a half. Anyone want the other box? :)
The colour turned a very bright red and I became a little unsure about this whole thing, but began anyway. It was a little annoying because it was a lot thicker than the box dyes I was used to, and it was so hard not to get the red dye on my skin.

After applying, I should have saran wrapped my head to keep the heat in, but didn't bother. That might have resulted in a brighter colour, for those of you who are aiming for that!

loreal hi color magenta hair dye dark hair red without bleach

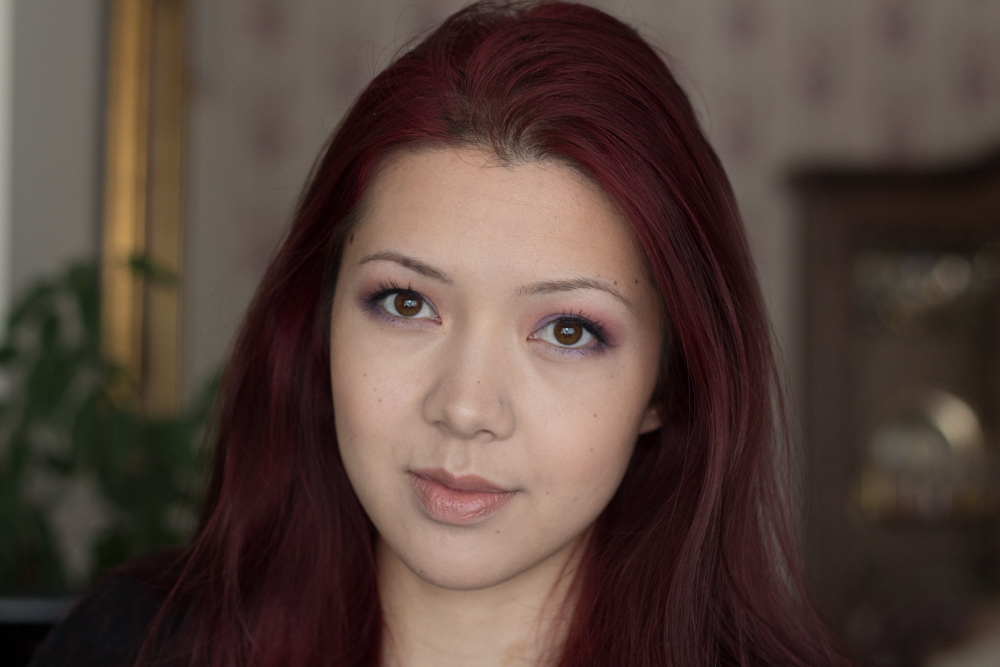
Tada! The pictures do NOT explain how embarrassingly bright my roots turned out but I have a few photos below. I guess I left the dye on a little too long in certain spots... After applying all the colour I left it on for 40 minutes or so, but it took me an hour to cover my whole head, so certain spots were already being lightened.

loreal hi color magenta hair dye dark hair red without bleach
Before & After

loreal hi color magenta hair dye dark hair red without bleach

I wasn't able to get a perfect application probably because I did it myself. I had a lot of patchiness underneath the top layer of the back of my head and it can be seen in the top left in the photo above. I'll really recommend you get someone to help you or at least watch you so you know whether you have missed any spots.

Here are some photos with different lighting, and mainly taken using my phone throughout the first month or so since dyeing my hair. 

loreal hi color magenta hair dye dark hair red without bleach

The photos above were taken the same day I had dyed it. As you can see in the photo on the right the lighting from my classroom, or even the sun made my hair super bright, especially on the roots. 

The photos below were taken a few weeks to a month after dyeing.

loreal hi color magenta hair dye dark hair red without bleach

The colour did fade a lot but stayed pretty red and never turned orangey on my hair. I quite liked it up until I had to dye it a few weeks ago because my roots were so terrible. Even my guy friends were telling me I needed to do them! Anyways, my overall experience with this hair dye was stressful! I wasn't comfortable using the red but it didn't turn out as bad as I thought it would have. The colour was bright, but mainly on my roots. I have seen other bloggers and youtubers and their results seemed much brighter, and more vibrant. I was happy with the colour when it began to fade, as it reminded me of red velvet cake, and it was more of the burgundy I was hoping for! Also, it never stopped bleeding in the shower, so I'd recommend a dark towel, every time you wash your hair, and be careful with the clothes you wear while your hair is still wet! Will I ever do this colour again? Probably not as it is too high maintenance, and I am very lazy and low maintenance when it comes to my hair. But I do love having a red/purple tint, so I will likely be staying a dark burgundy!

Would you dye your hair a vibrant red, or burgundy? 
For those of you that have any questions please feel free to ask me in the comments below :)

Shop:

The Five Product Face Challenge

the five 5 product face challenge tag

Hello Lovelies! Recently I haven't been able to post too often because of school starting up again. I am in my 6th semester and the workload has suddenly become extremely stressful! I mean, I have something due almost every day, sometimes multiple assignments due in a day. 

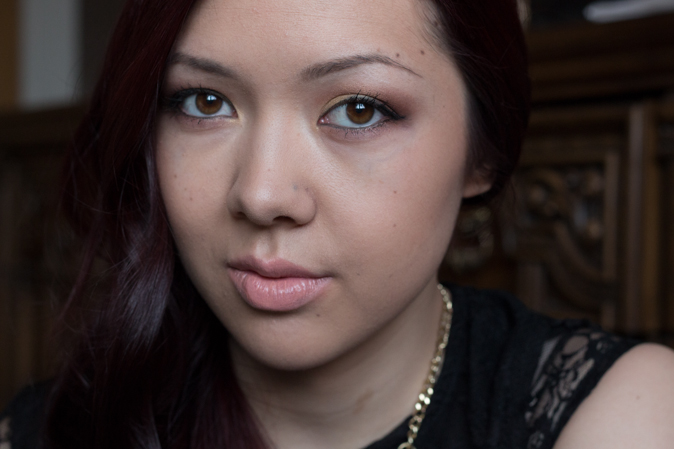
I really wanted to make time to do the '5 product face tag' because I thought it would be challenging. I usually wear a lot of eyeshadow because I am self-conscious of my eye shape. But after taking these photos, I surprisingly had the courage to go to school like this.

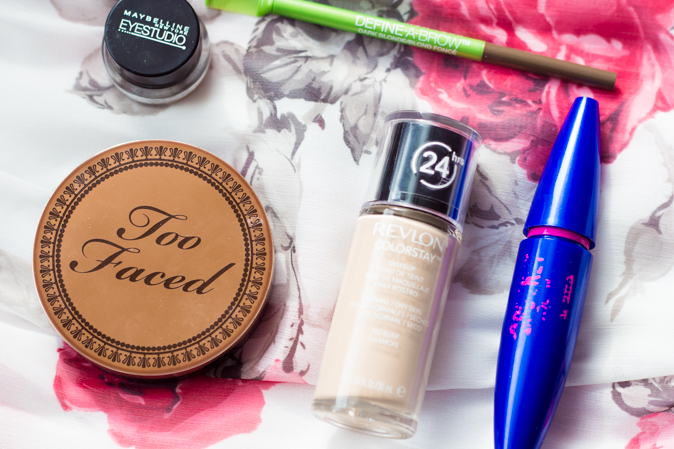
Products Used:
Face
 • Revlon Colorstay Foundation Normal/Dry Skin (Buff) 
 • Too Faced Chocolate Soleil Bronzer 
Brows
 • Maybelline Define-A-Brow (Dark Blonde) 
Eyes
 • Maybelline EyeStudio Gel Liner (Brown) 
 • Maybelline Rocket Volum Waterproof Mascara

In order of application; I used the Beauty Blender sponge to apply my foundation. Then, I used a bronzer all over my face to give it a glow and applied it slightly heavier on the cheekbones. To fill in my brows, I used define-a-brow in dark blonde; I don't like to use anything that will make my brows appear too dark. For the eyes I applied a brown gel liner and then curled my lashes and used a waterproof mascara. As you can see, I wasn't able to do my lips, hence why they are kind of 'nude', slightly covered in foundation. I also brought the foundation up under my eyes, because I wasn't able to use a proper concealer. I have listed all of the products above for your convenience!

Of course, I moisturized and primer beforehand. And I did use brushes and an eyelash curler. Hopefully these don't count as products because then I'd completely fail this challenge!
 I tag all of you that have just read this to attempt the 5 Product Face Tag!